Home-Grown Red Team: Creating A Red Team Development Workstation

Having a good red team development workstation is essential for creating payloads, testing out new tools and keeping your work organized. Operators have their own preferences on how to do this, but I thought I would share how I like to set up my workstation using automation.
Why Not Just Use Kali?
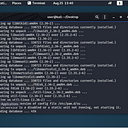
As you can see from the screenshot above, my workstation consists of a Ubuntu instance running a Kali VM and a Windows 10 VM. I use Ubuntu as a hypervisor and utilize the Windows 10 VM for development and operations.
We’ll get into the nuts and bolts in a bit, but I also set up shared folders between the 3 instances to easily share files back and forth. This is great for testing payloads, transferring tools and general convenience.
Ubuntu offers a much better user experience than Kali (in my opinion). I like that it comes with pretty user friendly software such as Thunderbird and Libre Office, plus you can download music software like Spotify. Sure, you can install these on Kali, but it’s nice to have them pre-installed on Ubuntu/Linux Mint.
Another reason why I like to keep a Kali VM rather than just using it as my daily driver is that I tend to turn a Kali VM into a big mess. After testing out tools and creating payloads, my Kali box becomes a combination of things that work, things that don’t work and duplicates of each.
It’s nice to just move what works over to the shared folder, delete the Kali VM and download another for a clean machine.
Like I said before, this isn’t the right way. There isn’t a right way. This is just my way and I think a lot of operators could benefit from this set up.
Requirements
Requirements are always a preference. I run my red team workstation in VMare Fusion off of a MacBook Pro with 32gb of RAM, 4TB SSD and an i9 processor. I give my workstation 16gb of RAM, 300GB of hard drive space and 6 processor cores.
Within the VM I give my Kali VM 2 processor cores, 4GB of RAM and 60GB of hard drive space. I give my Windows 10 VM 4G of RAM and 100GB of hard drive space. The minimum requirement of HD space to run Mandiant’s Commando script is 60GB (we’ll get into that later).
Could you get away with less? Sure. Can you run this on a PC or Mac as a base OS without VMware? You can. Could run this using VirtualBox instead of VMware? Yes.
Having a dedicated red teaming development computer with 16GB of RAM and 250GB of hard drive space would be ideal and it’s something I’ve considered to get my red team stuff away from my personal Mac. Maybe in the future!
The Install
Now that we’ve gotten all of that out of the way, let’s start the install. Since I am using this on VMware, we’ll do a clean install of our workstation.
NOTE: We are going to use my AutoC2 script. This works well with Ubuntu and Linux Mint both, however, the newest version of Ubuntu (as of right now) is incompatible with a lot of software so we are going to use Ubuntu 21.10. For Linux Mint you can use the latest version, but you will get some software specific errors. Check my github for specifics on that.
You can download the Ubuntu 21.10 ISO file here. For Linux Mint, I like the MATE edition, but you can choose what you want here.
Once the ISO file is downloaded, you can either use Etcher to create a bootable USB or you can build a new VM in VirtualBox or VMware Fusion. I use Fusion so we’ll go through those steps here.
At the top of VMware you can click on the “+” button. This brings up the installation menu.

From there you can simply drag your ISO image over to the menu to import it. Click “Continue” until you get to the “Finish” screen.

Now click “Customize Settings” and name your VM in the prompt that pops up. From the next menu you will be able to assign your VM it’s settings.

Click “Processors and Memory” and assign the amount of RAM and processor cores you want to assign your VM. Also click on the “Enable Hypervisor” options since we are going to use VirtualBox for our Kali and Windows VMs.

Click “Show All” to go back to the main menu and then click on “Hard Disk.”

Here we can assign the amount of disk space we want to assign the VM. I use 300, but you can get away with 250. Click “Show All” again to get back to the menu and select “Network Adapter.” Change it to “Wifi” to give your VM internet access.
We should be good to start the installation. Click on the “Start” button on the front of your VM to start the process.

The VM will start up and you’ll be prompted to set up your username, password, and all of the other settings that come with a Ubuntu/Linux Mint VM. I won’t go through all of the settings. If you run into issues, setting up the VM is pretty Googlable.
Running AutoC2
AutoC2 is a bash script that I developed to install the most common red team/pentesting tools used in the industry. While a huge majority of them come preinstalled on Kali, there are a lot that don’t. And since a lot of these tools are Windows based, we should have a Windows instance to get these tools compiled for testing.
Enter AutoC2. As mentioned before, the script will download all of your tools to Ubuntu/Linux Mint (your choice) and give you a Kali VM and a Windows 10 VM.
The script drops all of the Windows tools into a Windows_OS directory so you can easily transfer them over to your Windows instance. Within the Windows_OS directory the tools are separated out into Lateral Movement, Persistence, ect for easy recognition when trying to track them down.
In order to install of the tools, simply git clone the Home-Grown Red Team github, or navigate to the AutoC2 script here and just copy and paste it into your TextEditor.

Now save the file to your system as AutoC2.sh. Open a terminal and navigate to the directory that the script is in and run it as root.

Hit ENTER and wait for the script to finish. It’s not fully automated. You will have to put in some values and press ENTER a few times while it runs. When it’s finished, the VM will reboot.
When it comes back up, you should have all of your tools, VirtualBox, a Kali VM and a Windows 10 VM under /opt/Virtual_Machines.
Extract them if needed and add them to VirtualBox. Once they are added, go into the VirtualBox settings for Kali.

Click “System” and change the RAM to 4000MB. Click on “Processor” next and give it 2 processors.

Click “Display” and add the maximum amount of video memory if it is not already configured.

Now we need to set up the Shared folder. I like to keep mine in the home directory of my Ubuntu box, but you can put it anywhere you want.

Back on VirtualBox, click “Shared Folders” , click the folder icon with the “+” on it and then input the values you want from the menu.

Now we are ready to boot up Kali.

The default username and password is kali:kali. And in testing our shared folder, it looks like it’s working properly.

Now we can either exit Kali or we can run an update while we configure our Windows instance.
Back on VirtualBox, we need to install the extension pack. The extension pack should have download in the Virtual_Machines directory. You can simply double click it to begin the installation.

Click “Install” and accept the license. You will also have to authenticate to install the software. Now we need to apply the same settings as our Kali VM.
Give the Windows VM 128 MB of video memory and 4000 MB of RAM. Give it 2 processors. You will also have to change the video adapter to VBoxSVGA under “Display.”

When started, you will probably have an update before you can hit the logon screen.

Now we need to set up our shared folder. This is pretty much the same process as we did on Kali but with a different drive letter.

Last thing we need to do is increase the hard drive space for our Windows VM. On the VirtualBox home screen, click the “File” button and then click on the “Virtual Media Manager.”

From the next screen we can increase the hard drive size. We need at least 60GB to install the Commando tools.

Click “Apply” and now we should be able to boot our Windows VM.
The default username is already on the box, but the password is “Passw0rd!” You can change these once logged in if you want. If you’re going to use the instance as an OPs box, I would recommend it.

With our VM booted, we can insert the Guest Additions into the instance and run them. This will give us full screen and copy and paste capabilities.
Click “Devices” then click “Insert Guest Additions CD.”

Initiate the install by double clicking on the x64 option from the Guest Additions.

When you navigate to the guest additions CD you should also see your shared drive mounted.

You will need to reboot after the guest additions are installed.
After this reboot, update your system. You may need to run updates two times or more. Make sure that your Windows VM is FULLY updated before you move on.

Now that we’re up and running, we need to run the Commando script from Mandiant. This is going to download a lot of great tools to our VM such as Visual Studio, MobaXterm, OWASP Zap, ect. There is a lot of overlap from the AutoC2 script and what Commando installs but it’s good to have the pre-compiled binaries on hand.
Open Windows Security and turn off Windows Defender, Cloud Protection and Automatic Sample Submission.
Since we don’t have anything installed on this instance, the easiest way to start the install is to go to the Commando GitHub and copy the raw ps1 file from here.

Once you have the Commando script on your VM, we need to open it up in Notepad and make a slight change.
Search the script for the following line.
if (-Not (($disk.used + $disk.free)/1GB -gt 58.8)){We are going to change the 58.8 value to 20.8. The reason for this is that our virtual disk on VirtualBox has enough disk space allocated for all of the tools, but the hard drive only shows 40GB in your Windows VM. The VM’s hard drive space is dynamic so it will expand as the tools are installed.
The script will fail if you do not change this value before running it.
Open a Powershell window as an Administrator. Navigate to your script and then import it.

And now the script will start.

We can just let it run and install all of our tools. This script take a long time so don’t be surprised if it is still running after an hour or so.
Once the install has finished, your machine will reboot. If it doesn’t, manually reboot the system. After it comes back, your red team development workstation should be ready to go!
You now have a Ubuntu/Mint hypervisor with all of the red team tools you need, a Kali VM that’s up to date, a Windows 10 Commando VM and a shared folder between the 3 to keep processes flowing.
Have an idea that will make this workstation better? Hit me up on twitter @assume_breach or leave a comment!