Home Grown Red Team: Let’s Make Some Malware In C: Part 1

Welcome back! In this installment of Home Grown Red Team, we’re going to make some malware. Most of these techniques are we are going to go over were learned from the Sektor 7 Malware Essentials Course. I can’t recommend that course enough! So, if you have an interest in creating droppers, head over to their site and take their courses.
It should be said from the beginning that this is not a FUD malware type of post. There are a lot of those out there, but that’s not the goal of this. This is just to introduce some techniques and get our feet wet.
In this post, we are going to be using code samples that we find throughout different resources such as GitHub and ExploitDB so this can be used as a template to help you customize different POCs you find after 0days are dropped or when using tried and true evasion techniques such as HellsGate.
Also, we’re not going to get into process injection, PPID spoofing, syscalls or any of that. These are just the basics.
So, let’s get into it!
The Shellcode Runner
So, there are a million shellcode runners out there. We can scour the internet and find different methods such as QueueUserAPC injections, CreateRemoteThread, blah blah blah. But, for this POC let’s just stick with the basics.
As part of a calc shellcode POC, we find a classic shellcode wrapper published on ExploitDB authored by Sektor7.

Removing the shellcode, we have one of the most common combos of Windows API functions: VirtualAlloc, RTLMoveMemory, VirtualProtect and CreateThread. Perfect! Let’s copy this our Kali box and save it as shellcode.c.

Now that we have a shellcode wrapper, let’s talk a little bit about what’s going on in here.
We start with the main function and set the variable for our payload as well as the size of our payload. We make the memory writeable, move our payload into it, change the memory back to executable/read and then create a thread to execute our payload.
Pretty simple!
Let’s generate some shellcode to execute on a windows box.
msfvenom -f raw -p windows/x64/exec cmd=”C:\windows\system32\calc.exe” > shellcode.raw
We put it into our shellcode wrapper.

And we try to compile it, but we get an error.
x86_64-w64-mingw32-g++ -o TestCalc.exe shellcode.c -fpermissive -Wno-narrowing

Okay, no problem. Let’s fix the main function.

Now when we compile, we get a nice executable.

This is going to get flagged by Defender, so we’ll turn it off and transfer it our Windows instance.
And our test worked! We popped calc!

It’s kind of an ugly calc, but it worked. Doing a quick scan against Defender, we see that it’s toast.

But now that we have our POC ready, what can we do? There are several things that we need to employ to get this past Defender and several other AV engines.
AGAIN! This is not a FUD malware post. We are not going to FUD this shellcode runner.
AES Encryption For Payloads
While there are a lot of AV based problems in our POC, we’ll tackle the biggest one first: the payload. But how do we do that?
m4ul3r has a good script written in Python that will AES encrypt a payload and write it into a favicon.ico file. Let’s take a look.
https://github.com/m4ul3r/malware/blob/main/cpp/stealthy_dropper/create_favicon.py
Going through the script, we see that they have entered the shellcode in manually.

Let’s make it where it can take the shellcode from a raw file. We can delete the shellcode and then change the functionality.

We will also need to print our payload shellcode instead of embedding it in an ico file so we need to add a line.

Comment out all of the favicon stuff and we’ll wind up with this.

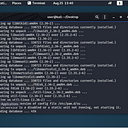
Now that we have a working script, we can AES encrypt our payload file. You will need to copy the shellcode.raw file to the same directory as the AES.py script we edited.
Running the script, we get our AES key and encrypted payload!

Awesome. Let’s add this to our POC.

But now we have a few problems. We have a “key” that we need to put in and our payload size has probably changed from the original calc payload. So the “unsigned int payload_len = 276;” line is probably not going to work.
Let’s add our key first.

And now, let’s make it to where the payload_len integer just pulls the size of the payload automatically.

Great! But wait a minute. This isn’t going to run as-is. We need to decrypt the payload before runtime. So we need a decryption function.
We’re in luck because snovvcrash has one for us in his playbook.

So we paste the function into our POC.

But, we need some headers. These can be found on m4ul3r’s dropper POC. We don’t need all of them since we’re not doing anything with the resources section. We just need the encryption headers.

So let’s take what we need and paste them into our POC.

Great! Now, we need to decrypt our payload. We can add the decryption commands to our POC.

Let’s compile it and run it on our target.

And we pop calc.

But what about Defender?

No threat found. All right! We bypassed Defender by just encrypting our payload. While Defender is probably the biggest AV engine we want to target, we want to see what else might flag us.
Let’s see how our malware fares against other vendors. Let’s upload it to AntiScan.me and see what we have.

Not too bad! AVG and Malwarebytes are pretty common AVs so we need to take this further. So what can we do?
Obfuscation
There are several things that we should change out. The first thing we should switch out is the “payload” string.

We’ll do the same thing with other strings such as exec, rv, th and key. Once that’s done, we should switch out the AESDecrypt function name.

One way that AVs and EDRs flag malware is from the Windows API functions they pick up on. So we can use a technique from the Sektor7 course and encrypt the WinAPI functions.
Bl4ckM1rror’s FUD-UUID-Shellcode POC has a great XOR encryption script that we can use.
https://github.com/Bl4ckM1rror/FUD-UUID-Shellcode/blob/main/xor_encryptor.py

Let’s change the key out for something else and run the script.


Running the script, we see that a file is needed. Looking at the original POC, we know that this script is used to encrypt a shellcode file. However, we can use this to encrypt our WinAPI strings by creating a txt file with the name of the function inside.

And now we have an XOR’d function string.
But let’s stop for a second! I’m going to let you in on a little secret. After running through this myself, I figured out that the script appends an extra byte to the string.
Annoying, right? So, the last byte of the string needs to be removed. If you are using the same key as I did, we need to remove the “0x65” from the string before moving on. Here’s our new string.

Going back to the FUD-UUID-Shellcode github, we can grab the XOR function from the POC and put it in our own malware.

We also need to add our key to the malware for the XOR function.

But to encrypt our function string, we need to set up a few things. Starting with VirtualAlloc, we need to set up a pointer and add decryption before the function is executed.
Checking the MSDN for VirtualAlloc, we get all of the parameters we need.

Let’s add this to our POC and set up the pointer as a global variable.

Now we need to add the “p” to our VirtualAlloc function in Main to correlate to the pointer.

We need to set up a global variable for the encrypted VirtualAlloc string.

We’ll also set up our XOR decryption for the pointer in Main.

And a pointer to the encrypted string.

Now let’s compile and see if we can get execution. At this point, we’re going to flag Defender so we need to turn it off.
And on execution, we get our ugly ass calc!

Scanning it against Defender, we see that is in fact flagged.

Now, I know what you’re thinking. What was the point of all that if it’s going to get flagged by Defender?
At this point we have the bare bones of our POC. We need to obfuscate it more. Let’s start with common strings that could get flagged.
“key” is a good place to start. Let’s replace all of the “key” strings with “aeskey”. Make note that find and replace won’t work with this because you’ll replace the “key” string in “xor_key” also. So you’ll have to go through manually.
You’ll wind up with this:


Testing against execution, the POC still pops calc. So now let’s go a little further. Let’s switch out the “XOR” function name.


And “xor_key”.

Let’s recompile and test against execution.

And it still works! Defender?

Still flagged.
Well, here’s an assume_breach exclusive! If you change the “size_t” to “int” in the XOR function, we can bypass Defender.
So this:

Will become this:

When compiled, we aren’t flagged anymore.

Pretty dumb, right?
Let’s see how this stacks up against AntiScan.me.

Sweet! We brought our detection down by 1. So MalwareBytes no longer sees us as a threat.
Let’s encrypt another function. This time let’s go for CreateThread. We’ll get our encrypted string.

Next, we check the MSDN for the function to get the parameters.

Let’s create the pointer and remove the optional parameters. We can also create the encrypted pointer.


It compiles properly. But let’s do some more obfuscation. Let’s obfuscate this XOR function a little more. Here’s the original function.

Let switch out data, key, and j for something else.

And let’s encrypt the WaitForSingleObject API function.


This is going to end our signature/WinAPI function obfuscation.
Let’s rescan our POC and see what’s up.

Pretty good! We seemed to have bypassed Eset this time!
Just for fun, let’s put a real payload in here and give it a scan. For this, I’m going to use a Covenant payload that has been obfuscated with my Covenant Randomizer script.

And now it’s only detected by 1 vendor, and not a popular one at that. So as you can see, the payload matters.
What Else Can We Do?
To be honest, there’s a lot. One of the main things that we are missing is a digital signature. There are a million tutorials out there on how to create a digital signature for an executable so I won’t go into that.
You can also use SigThief and steal the signature from a valid binary to sign your dropper with. The github for SigTheif is pretty straight forward so I’ll leave that up to the reader as something to do yourself.
We could also translate all of these WinAPIs into syscalls, but that’s another beast so we’ll save that for later.
Wrapping Up
This write up was just a primer on some of the techniques that are out there for obfuscating malware to get past AV/Defender. As you could see from the demonstration, bypassing Defender is not really that difficult with the right tools.
Github has a ton of scripts, POCs and shellcode wrappers to help you along the way. If you haven’t taken the Sektor 7 course, take it. There are other techniques that are much more efficient than this.
Our shellcode wrapper is probably the most basic out there and is signatured by a lot of AV/EDR. As we saw, the payload also matters so keep that in mind when you’re testing and developing your own droppers.
What’s Coming?
Since this is a part 1, there must be a part 2, right? In part 2 I’m going to show you how you can script this out to give you a fresh executable every time with randomization.
If you want to follow along or can’t get a script from this write-up to work, I have uploaded everything to a GitHub repo.
If you have any questions or want more content, follow me on here or on Twitter @assume_breach