Home-Grown Red Team: Using PhishPi For Captive Portal Evil Twin Attacks And Website Cloning

A captive portal is one of the more interesting topics in the Wifi hacking arena. If you’re not familiar with what a captive portal is or what it does, think about a time when you’ve been prompted to enter an email and password to get internet access. This could have been at a hotel, airport or even at your job.
In order to exploit captive portals, we can use what is known as an evil twin attack. An evil twin is when you spin up a Wifi access point with the same name as a legitimate access point. You can then deauth a client and hopefully, they will manually connect to your access point.
What I like about captive portals is that you can easily customize them for your engagement. If you’re looking to get the Wifi password, Office 365 domain credentials or another type of login information (VPN creds), you can customize a captive portal to help with this.
In essence, captive portals are extremely similar to a phishing landing page. They are used to coerce a target to authenticate and then dumps creds or creates a reverse shell.
There are a lot of tools out there for captive portals and other Wifi hacking techniques. Airgeddon, WifiPhisher and Fluxion are some of the most popular. However, not all of them gave me the features that I wanted. Plus, some of them have trouble being run over SSH. So, I decided to start building my own tool.
PhishPi
PhishPi is a Wifi hacking/Phishing platform that combines several tools and techniques into an easy to use, SSH enabled script.
There are currently 5 modules to choose from. I will update this article as more modules are created.

We’ll go through each of them, including the installation process.
Requirements
In the conception of PhishPi, this was meant as a tool to be used with a Raspberry Pi 3, 4 or Zero W/Zero W2. In theory, the install script should work with Kali/Ubuntu, however, other dependencies might be needed to get the tool to work.
NOTE: I plan on fully supporting Kali/Ubuntu for the tool in the future, I just haven’t had time to test it.
- Raspberry Pi 3/4/Zero W/Zero W 2 running Raspbian
2. Minimum of 2 injection enabled Wifi Dongles (I use 2 Alfa AWUS036ACS adapters and have an install script on my GitHub).
3. 8GB Micro SD (Minimum)
4. Computer/SSH client to interact with your Pi
Installation
Installation of the tool is extremely simple. You will need to clone the whole Home Grown Red Team repo.
git clone https://github.com/assume-breach/Home-Grown-Red-Team.git
cd /Home-Grown-Red-Team/PhishPi/
For the purpose of this writeup, I will be using a Raspberry Pi 3B+.

From here, we want to use the RPi3B_4_0W_install.sh script.
bash RPi3B_4_0W_install.sh
The script will install of the packages we need.
Once it’s finished, we do not need to reboot the Pi.
We can run bash PhishPi.sh or we can give the script executable permissions for further use.
bash PhishPi.sh
or
chmod +x PhishPi.sh
./PhishPi.sh
Now we are at the menu for the tool.
Office 365 Domain Credential Phish
The first module in the tool is the Office 365 Domain Credential Phish module. This module does a few things to try to trick the target to authenticate.
The tool will allow you to name your Wifi access point as something similar to the target’s access point, clone the target company’s home page and then redirects to an Office 365 captive portal.
Let’s see it in action.
We type 1 to use the module and we are brought to the O365 Domain Credential Phisher prompt.

The first prompt is asking what network interface we want to use as our access point.
Since I have 2 wifi adapters, 3 including wlan0 from the pi, I’m going to use wlan1.

The next prompt asks us what Wifi network we want to spoof. For the purposes of this demonstration, we are going to pretend we are attacking Tesla’s Corporate Wifi network.
I have spun up a Windows 11 virtual machine and created a Wifi network named Tesla Wifi Network.

In the PhishPi prompt, I’m going to name my Wifi network Tesla Corporate Wifi so we can see the difference.
The next prompt asks what domain we want to spoof.

Because we’re not using SSL certs (yet) we will need to keep the syntax as it is in the example. For our demo, we will use “tesla.com.”
The next prompt asks for the website we want to clone. For this demo, we will use “https://www.tesla.com.”

The tool will then clone the website specified and kick off the meat and potatoes of our evil twin attack.
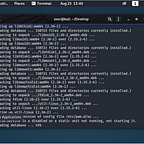
The screenshot below shows all of the steps utilized to spin up our access point.

These steps include moving our cloned webpage into /var/www/html so Apache can serve it, starting apache and then changing the MAC address of our access point NIC.
The tool then starts hostapd, bring up the bridged network NIC, copies a redirect into our cloned page, sets IPtables and then starts the rouge DNS server.
Now our access point should be up. Let’s check on our Windows 11 VM and see.

All right, looks like it’s there! Let’s connect and see what happens.

As we connect to the network, it is recognized as a captive portal by Windows 11. A browser window opens and we are directed to Tesla’s homepage. Notice in the URL bar that we are at “tesla.com.”
After a few seconds, not enough time for a target to navigate around the page, we are directed to another page.

This page informs the user that we are being redirected to “Single Sign-On Authentication”
We are then redirected to the Office 365 login page.

This page prompts the user to log into the page for Internet access using their domain credentials. Let’s pretend to be a user and see what happens. We’ll be “danny@tesla.com” with a password of “tesladomainpass”.

When we click “Sign in” we are thanked for authenticating and then redirected to a “Loading” screen.

At this point, the user will just be waiting forever because this is straight text and nothing is happening behind the scenes.
Meanwhile, back on our Pi, we can navigate to /var/www/html and take a look at creds.txt.

Here we have valid domain credentials for the user in plaintext.
Now with credentials, we can run MFASweep or something similar to see what O365 products we can log into without MFA. We could also try these credentials on any external VPN sites we come across or an OWA app if we found one.
Wifite With A Cewl Generated Wordlist

The Wifite module is a tool that will scrape the company’s website and use this as a wordlist for handshake cracking. The tool will also use Hob0rules to create variations on the words.
It’s not a secret that many small to medium sized companies use easily crackable passwords for their Wifi. This tool is designed to crack low hanging fruit, not WPA-Enterprise level security. This is simply for quick wins.
When we choose the module, the first prompt we get is for the interface we want to use.

I’m choosing wlan1. The tool then prompts for the homepage of the company you are attacking.

Since we are using Tesla as our example, we will put the homepage into the prompt.

We will then need to choose the minimum letter count for words. The tool will then start scraping words from the company page and utilize hashcat to mutate the words with the Hob0rules rule set.

As we can see from the screenshot, the rule set is added and Wifite is launched. We are using wlan1 as our interface and “hashcatted.txt” as our wordlist for handshake cracking.
We choose the network that we created, “Tesla Wifi Network” as our network to attack.

After running for a bit, Wifite deauths a client, captures a handshake and cracks the password, “Powerwall123”.
Obviously, this is a very controlled example, but for easily crackable passwords, the attack will take less than 20 minutes.
Clone A Single Website Page

The cloning module is fairly simple. When you enter the module, you will be asked for the URL of the website you want to clone.

Going with our original example, we will clone Tesla’s homepage. We can navigate to the Cloned_Pages directory and our cloned page will be there.
cd Cloned_Pages

If we move it to /var/www/html/ and navigate to the IP, we can see it.

Deauth A Wifi Network
The deauth module uses mdk4 to deauth a network. It launches a Tmux session so you can disconnect from it to run other modules from the platform.
When we use the module, we are prompted for the interface to deauth from. We will continue with wlan1.

Once we choose an interface, the module will launch Airodump so we can see the BSSID that we want to deauth.

Let’s choose the Tesla Wifi network that I have created.

We press CTRL C and are prompted for the BSSID.

We can copy and paste the BSSID into the prompt and make a note of how to properly disconnect from the Tmux session.

Once we hit Enter, we are taken into the session and can watch the deauth packets go out.

We can disconnect using CTRL + B and then press D. To reattach you can use the following command.
tmux attach-session -t deauth
Press CTRL C to exit the session and quit deauthing.
Clone A Login Page For Credential Harvesting
The next module is a credential cloning page. This module allows an attacker to quickly clone a page that requires a login, replace the “action=” field contents to redirect the output to the “creds.txt” file in /var/www/html/.
This module is perfect for phishing campaigns because it will push your cloned login page out to a C2 server in the cloud. You can then send a link to your victim.
For the purpose of this demonstration, I have spun up a Digital Ocean droplet.
NOTE: This module is a little hit or miss due to different website coding. Your index.html file may need additional editing/configuration.

Here we are cloning the Wells Fargo sign in page as a proof of concept. At the prompt, I enter my C2 server IP and the user that is authorized to log into SSH.

Note: Your C2/domain must have Apache2 installed as well as PHP.

The tool will then prompt for the password and transfer the applicable files over.
If we navigate to the C2’s IP we are met with the login page.

Let’s put in a test username and password.
Username: wells
Password: fargo
The user is then met with the “Loading…please wait” static webpage.

Over on our C2 server we can cat our /var/www/html/creds.txt.

And the creds are copied over in cleartext.
Again, this module is a little iffy so you will need to experiment with it at this time. I will work to get it much more stable in the future.
As more modules are added, I will update this article. For more tools, techniques and red team things, follow me on here or on Twitter @assume_breach